

Find the problem before buying the product. A drafty or uncomfortable window may be leaking around a moving sash, through a fixed crack, or not leaking at all—the glass may simply feel cold or collect direct sun. This guide helps you identify which one you have, then choose the least disruptive fix: weatherstripping, caulk, rope caulk, plastic film kits, thermal curtains, or DIY window inserts.
Work from the smallest reversible fix toward the more involved one, and retest before repeating it elsewhere. If the job expands into a larger insulation or air-sealing project, our energy-efficient home improvement credits guide can help you check whether the work may qualify.
This post contains affiliate links. If you purchase through them, I may earn a commission at no extra cost to you. As an Amazon Associate, I earn from qualifying purchases. Links marked with “#ad” are Amazon affiliate links. Learn more.
Table of Contents
- Find the Window Problem First
- Before You Start: Clean, Measure, and Check Safety
- Find the Right Window Insulation Fix
- Compare the Six Methods at a Glance
- Window Insulation How To: Six DIY Methods
- How to Adjust the Fix for Winter and Summer
- What to Expect—and What to Check if the Draft Remains
- Frequently Asked Questions
- Your Next Step: Fix One Window and Retest It
Find the Window Problem First
Window insulation is easier when you separate air leakage from heat moving through the glass. Close and lock the window, then check it on a windy or very hot/cold day.
- Air at a moving sash or track: use weatherstripping sized for the gap.
- Air at fixed trim, sill, or frame joints: use caulk, backer rod, or another stationary-joint seal.
- No clear draft, but the glass feels cold or sun-baked: use film, a close-fitting shade or curtain, or a removable insert.
- Several symptoms overlap: diagnose and seal air leaks first; a covering cannot repair a loose sash or deteriorated frame.
A hand test is usually enough to find obvious drafts. Incense can make air movement easier to see, but keep flame and smoke away from curtains, finishes, children, and pets. A surface-temperature tool can show which area is colder, but it does not tell you by itself whether the cause is air leakage, glass performance, moisture, or missing wall insulation.
Before You Start: Clean, Measure, and Check Safety
- Operate the window first. Open, close, and lock it so you know what must continue moving and where the sash should compress.
- Clean and dry the contact surfaces. Tape, caulk, putty, and adhesive weatherstripping fail early on dust, grease, condensation, or loose paint.
- Measure the actual gap. Check more than one point; old frames are rarely perfectly square, and an oversized seal can keep the lock from engaging.
- Protect drainage and emergency use. Do not block exterior weep holes, tracks, vents, handles, or a window required for egress.
- Treat old paint cautiously. Before scraping or sanding a painted pre-1978 window, review the EPA’s lead-safe guidance for DIYers.
Stop the DIY insulation job if the wood is soft or damp, the sash will not close squarely, condensation sits between sealed panes, or the same leak returns after two careful attempts. Those signs point to a frame, glazing, moisture, or fit problem rather than a missing roll of tape.
If the window passes those checks, answer one symptom question and one short follow-up. The finder will point you to the least disruptive method that fits how the window actually needs to work.
Find the Right Window Insulation Fix
Choose the closest symptom. The finder asks one follow-up, then points you to the best starting method.
Compare the Six Methods at a Glance
Your result is a first method to inspect, not a command to buy. Use the table to compare whether that method keeps the window operable, can be removed, and fits your time. Test one window before buying enough material for the room.
| Method | Relative Cost | Rough Hands-On Time | Window Can Open? | Best Use |
|---|---|---|---|---|
| Weatherstripping | Low | 30–60 minutes | Yes | Moving sash and operable joints |
| Caulk | Low | 15–30 minutes plus cure time | Yes, if kept off moving parts | Fixed cracks and frame joints |
| Rope caulk | Low | 5–15 minutes | Not until removed | Small removable seasonal gaps |
| Plastic film kit | Low | 15–30 minutes | No | Seasonal interior air layer |
| Thermal curtain or cellular shade | Medium to high | 15–60 minutes | Yes | Cold glass and solar heat |
| DIY window insert | Medium | 1–2 hours | Only after removal | Reusable interior air layer |
Window Insulation How To: Six DIY Methods
Once you have a likely match, use the steps below. Start with air sealing, retest, and add a pane covering only if cold glass or solar heat still makes the room uncomfortable. Each method begins with a best-fit and skip condition so you can avoid sealing a moving part, drainage path, or egress window.
Weatherstripping for Moving Sashes and Joints
Best for: air leaking where an operable sash, slider, or crank closes.
Skip when: the crack is between stationary materials; use caulk there.
Match the seal to the frame rather than choosing by appearance alone. A self-adhesive silicone strip fits many medium gaps on a clean, flat sash edge; compressible foam suits wider or uneven flat stops; brush seals work on some sliders; and a push-in kerf seal requires an existing channel.
Flat sash edge with a 1/8–1/4-inch gap? Use the Duck Brand Max Strength Silicone Weatherstrip.
Its self-adhesive silicone separates into two 8.5-foot strips. Test a short section first and confirm the sash still closes and locks without extra force.
- Remove loose or crushed weatherstripping and clean the contact surface.
- Close and lock the window, then measure the gap where the seal must compress.
- Choose the format that matches the frame: hinged V-seal for a narrow clean flat edge, compressible foam for a wider or uneven flat stop, brush for some sliders, or a kerf seal only for an existing slot.
- Install a short test piece first. The sash should close and lock without excessive force.
- Finish the run, trim cleanly at the corners, and repeat the draft test.
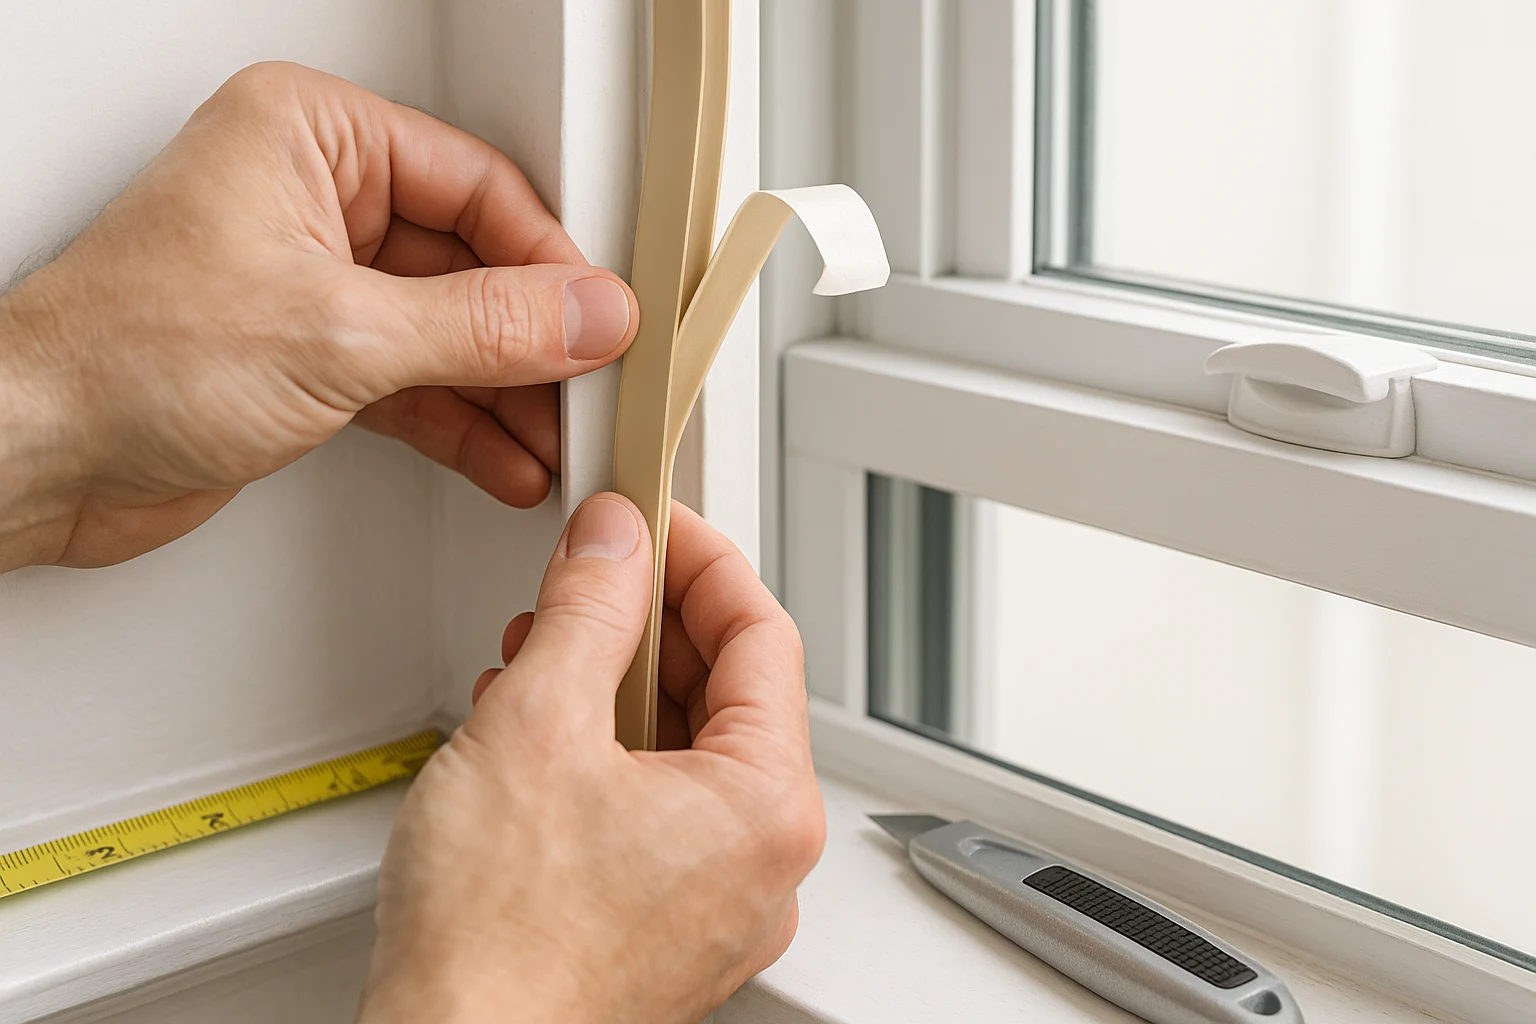
Existing kerf channel? Use the BBTO 60-foot V-shaped foam kerf weather seal only when the old seal pushes into a matching groove. Compare the original profile and channel before ordering; this product will not adhere to a flat stop.
If the channel is missing, damaged, or an unknown size, do not force a kerf seal into place. Use a flat-surface weatherstrip instead or replace the existing profile like for like.
Caulk for Fixed Cracks Around Frames and Trim
Best for: stationary gaps at trim, sills, frame joints, and other fixed seams.
Skip when: the part moves, drains, or needs to be removed seasonally.
- Confirm that both sides of the crack are stationary.
- Remove only loose failed material, then clean and dry the joint.
- Use backer rod for a deep gap when appropriate, rather than filling the whole void with caulk.
- Apply a continuous bead sized to the joint and smooth it before it skins over.
- Let it cure according to the product label, then retest the area on a windy day.
For larger accessible voids between the window jamb and rough framing, see the limits and application steps in our DIY spray foam insulation guide. Use only a product and amount suitable for windows and doors; excessive expansion can distort a frame.
Rope Caulk for Small Removable Seasonal Gaps
Best for: renters and small fixed cracks that need a reversible winter seal.
Skip when: the surface is fragile, the gap is wet, or the window must open often.
- Clean and dry the gap.
- Press the putty into the crack without forcing it into tracks or drainage paths.
- Test a hidden area before covering a painted or delicate finish.
- Remove it when the season changes or before operating the window.
Plastic Film Kits for Windows That Stay Closed
Best for: a cold or lightly drafty window that can remain closed through the season.
Skip when: the window is used for ventilation, regular access, or emergency egress.
Plastic film adds a still interior air layer, but it prevents normal window use until removed and can conceal condensation. Keep it off egress windows, start with a clean, dry frame, and check behind the film during the first cold spell.
Window staying closed for the season? Use the Duck Brand shrink-film window insulation kit.
It bundles the film and tape for up to 10 windows, making it the lower-friction option when you do not want to source the materials separately.
- Choose a stationary mounting surface around the window, clear of locks, blinds, and moving parts.
- Clean and fully dry the frame so the double-sided tape can bond.
- Apply the tape in one continuous perimeter, pressing corners firmly.
- Attach the film with a little slack, then shrink it gradually from the center outward with a hair dryer.
- Trim the excess and inspect the tape line for loose corners.
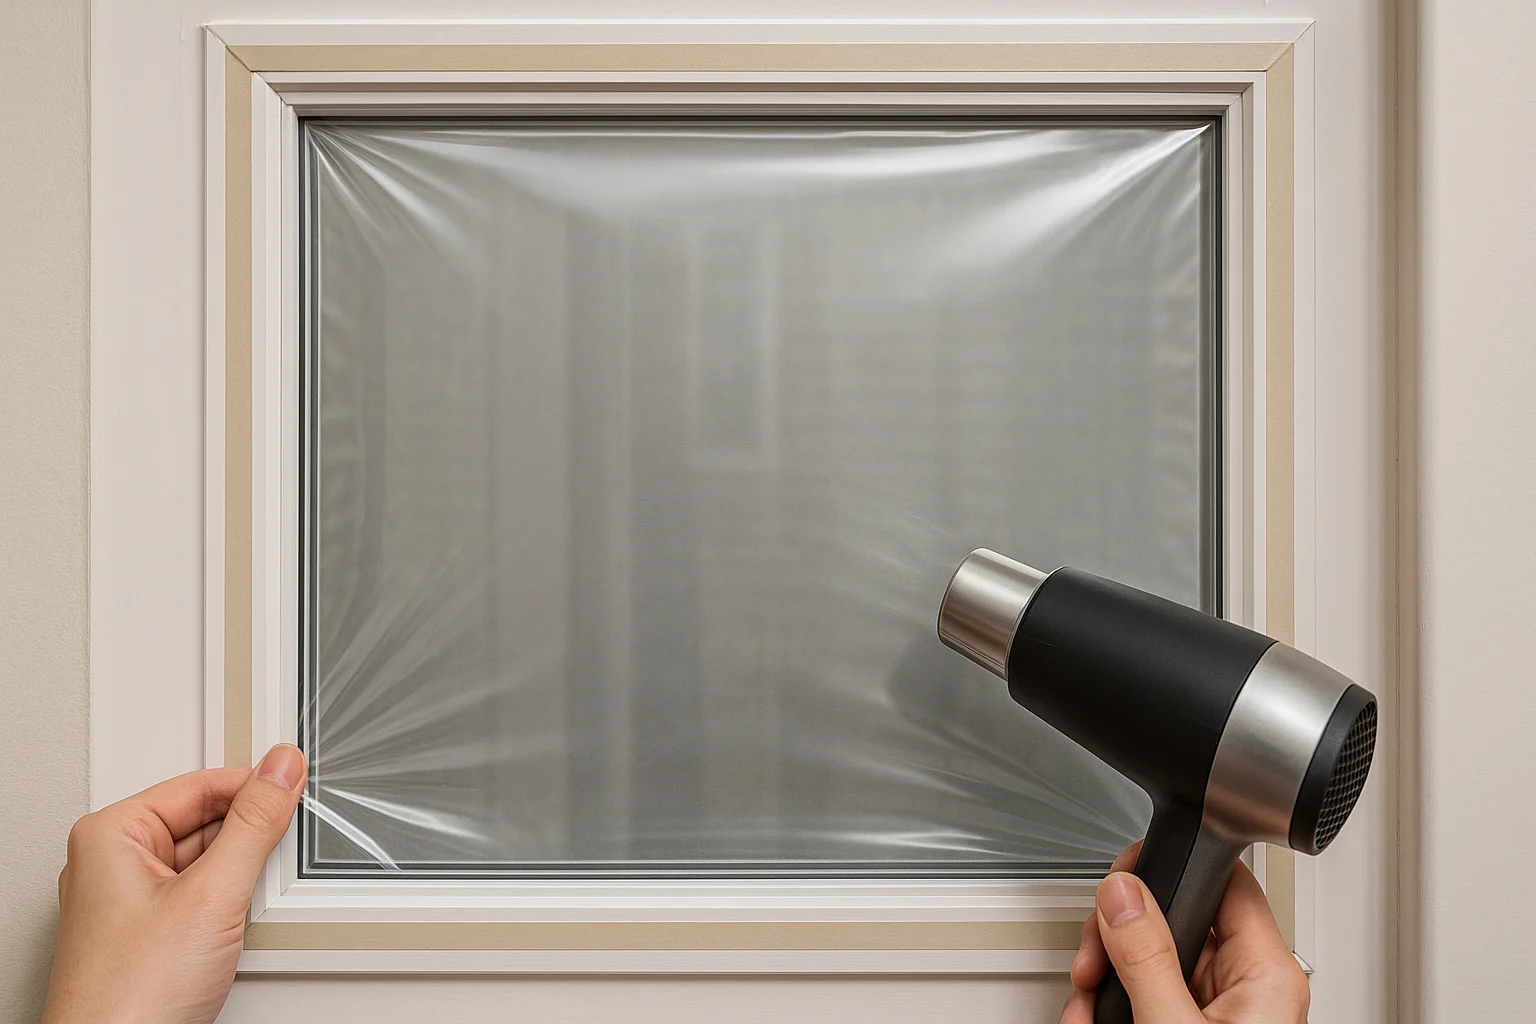
Film can work with blinds when the film mounts far enough out that neither the blind nor its hardware rubs it. Bubble wrap can create a temporary still-air layer on a low-visibility pane, but it blocks the view and can hide moisture; remove it if condensation collects.
Thermal Curtains and Cellular Shades for Cold Glass and Solar Heat
Best for: a window that operates normally but feels cold nearby or overheats in direct sun.
Skip when: you still feel air moving around the sash or trim; seal that leak first.
- Measure for overlap beyond the glass and frame so air does not flow freely around the sides.
- Mount the covering close to the window without blocking handles, vents, or safe operation.
- Close thermal curtains or cellular shades at night in winter and during the hottest sunny hours in summer.
- Open them for useful winter sun, daylight, and ventilation.
- Check periodically for condensation behind a tightly closed covering.
DIY Window Inserts for a Reusable Interior Air Layer
Best for: older windows that rarely open and need a reusable, clearer alternative to seasonal film.
Skip when: the frame is badly out of square, damp, deteriorated, or needed for frequent access.
- Measure the opening at the top, middle, and bottom, then repeat vertically at both sides and the center.
- Choose clear acrylic or another suitable panel material and follow the supplier’s thickness and cutting guidance for the opening size.
- Dry-fit the panel before adding the gasket.
- Apply closed-cell weatherstripping or another compressible edge seal so the insert presses in without damaging the frame.
- Add finger pulls or another safe removal point, label the insert by room, and store it flat when not in use.
If the window is no longer the main cold surface, the next useful check may be the surrounding wall. Our wall insulation DIY guide explains where deeper envelope work may matter more than another window layer.
How to Adjust the Fix for Winter and Summer
The diagnosis stays the same year-round; what changes is when you open coverings, how you handle direct sun, and whether the window must remain operable.
Winter: Stop Air Leakage, Then Slow Heat Loss
- Refresh weatherstripping and fixed-joint caulk before installing film.
- Use plastic film kits only on windows that can stay closed.
- Close thermal curtains at night and open them for useful daytime sun.
- Check for condensation after tightening the window system; insulation should not hide an active moisture problem.
Summer: Seal Humid Air and Control Direct Sun
- Keep weatherstripping and caulk in good condition so conditioned air is not leaking out.
- Close shades or curtains before direct sun heats the room, especially on strongly exposed windows.
- Use an exterior shade only where it is permitted and can be installed safely.
- For DIY window AC insulation, seal only the gaps around the approved sash kit; do not block drainage, controls, intake, or exhaust openings.
What to Expect—and What to Check if the Draft Remains
Air sealing and window attachments solve different problems. The U.S. Department of Energy’s air-sealing guidance separates caulk for stationary cracks from weatherstripping for moving windows and doors. A DOE summary of window-attachment programs also reports improved heating performance from rated cellular shades in a specific field study—but that does not create a universal savings percentage for every home or every window product.
If the first fix does not help
- Retest the exact location. A draft at the sash can remain even when a nearby trim crack was sealed.
- Check operation and compression. The sash should close, lock, and compress the seal without excessive force.
- Look for moisture or failed components. Soft wood, recurring dampness, or condensation between sealed panes points beyond a surface insulation fix.
- Compare the window with the surrounding wall. If the wall is the colder surface, another layer on the glass may not solve the room-level problem.
Optional: Compare Surface Temperatures When the Cause Is Unclear
Best for: repeated comparisons between the glass, frame, and nearby wall under similar conditions.
Skip when: one moving-air leak is already obvious or you need an air-temperature reading.
Touch is enough for a clear difference. When several surfaces feel similar, an infrared thermometer can provide repeatable surface-temperature readings that help you choose where to inspect next.
An infrared thermometer measures surface temperature only. It cannot prove air leakage, failed glazing, a moisture source, or missing wall insulation; use the reading to decide where to inspect next.
If the first window improves, repeat the same method where the symptom matches. If it does not, stop layering products and return to the diagnosis. For whole-home priorities, see how to lower your electric bill.
Frequently Asked Questions
Your Next Step: Fix One Window and Retest It
Choose the draftiest or most uncomfortable window—not the whole house. Lock it, identify whether the problem is a moving joint, fixed crack, cold glass, or direct sun, and install only the matching fix.
On the next windy, cold, or sunny day, repeat the same test and check that the window still opens, locks, drains, and stays dry. If comfort improves, use that result as the template for the next window. If it does not, stop adding layers; the problem may be the frame, glazing, moisture, or surrounding wall.
This guide is educational and general in nature. It is not building, energy, or tax advice. Actual savings vary by home, climate, and installation quality. Consider consulting a qualified contractor or energy auditor for your specific situation.