
Got a pile of broken crayons taking up space? Turn them into vibrant, personalized monogram letters with this easy upcycled craft. It’s budget-friendly, kid-safe (with adult supervision), and perfect for gifts, teacher appreciation, nursery decor, or playroom accents — all while keeping waste out of the landfill.
Why Make Crayon Initials?
These recycled crayon monograms are:
- Completely free using broken crayons you already have
- Eco-friendly — perfect for upcycling school donations or home leftovers
- Customizable with any letter, color combo, or theme
- Great kid craft (adults handle hot glue)
- Long-lasting personalized decor or thoughtful gifts
- Ideal for birthdays, holidays, teacher gifts, or nursery art
Materials You’ll Need
- Broken or unwanted crayons (new ones work too)
- Wooden letter (craft store, dollar store, or reclaimed wood)
- Hot glue gun and glue sticks
- Scissors or craft knife (for cutting crayons)
- Sandpaper (optional, for smoothing edges)
- Non-toxic craft glue or clear sealant (optional, for extra durability)
- Picture frame or removable wall strips (optional, for display)
Step-by-Step Instructions
- Prep the letter: Sand any rough edges on the wooden letter. If painting the sides/back, do it first and let dry completely.
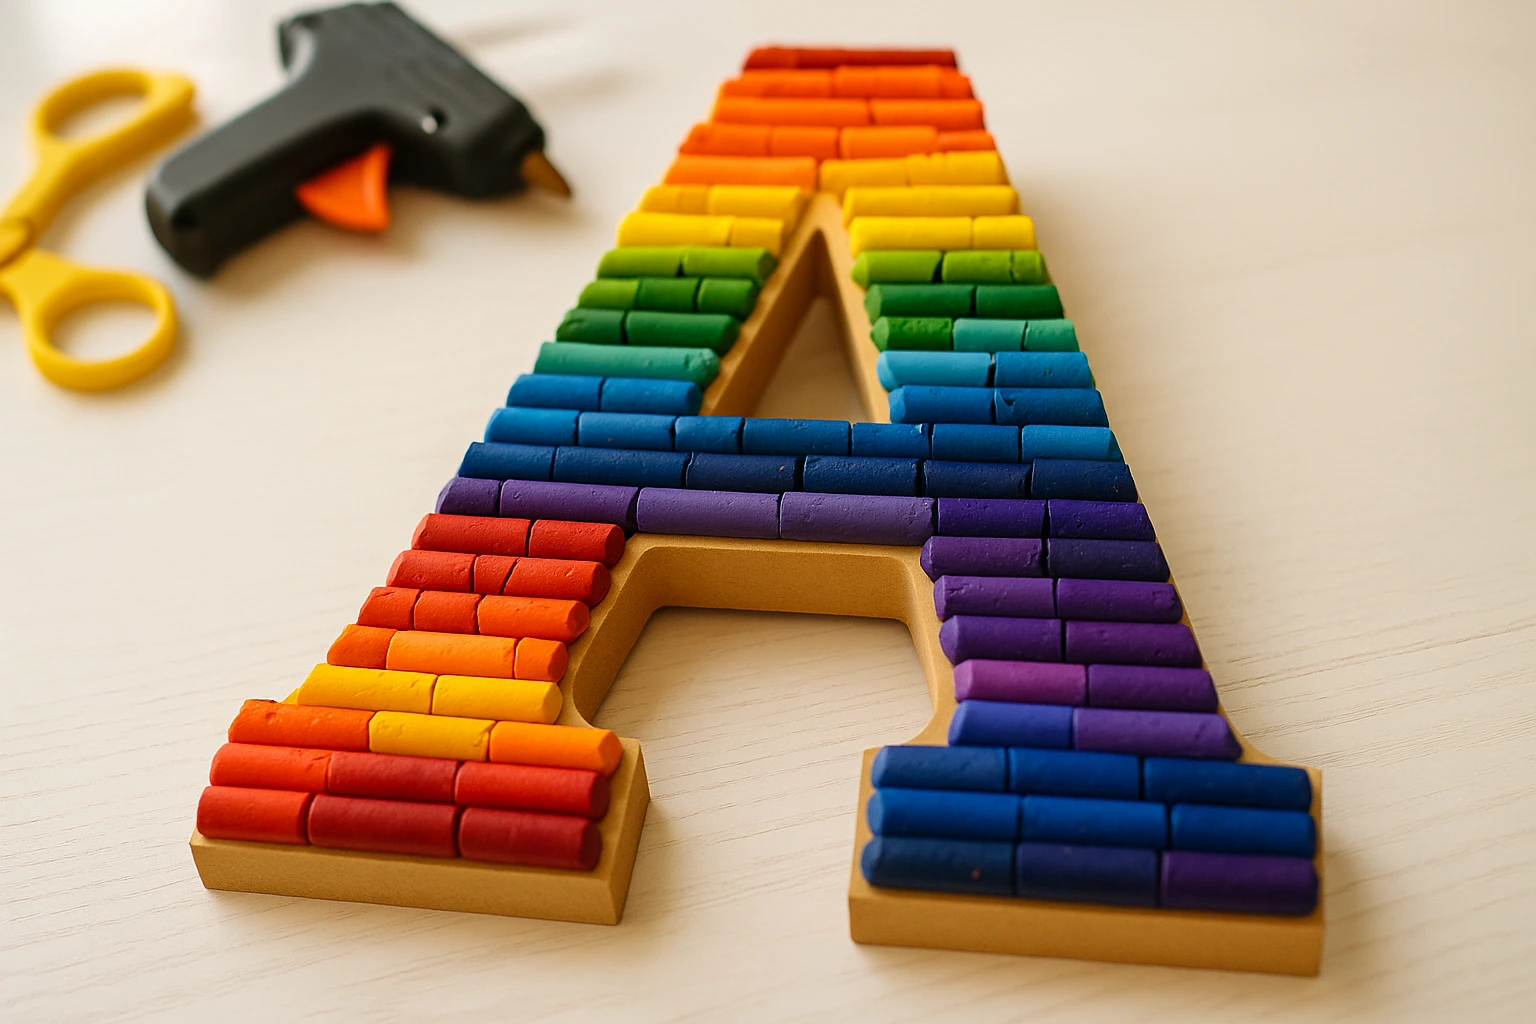
- Prep the crayons: Peel off wrappers (warm water helps). Sort by color. Cut or break crayons into ~1-inch pieces. If you want a cleaner look, lightly sand the cut ends.
- Plan the design: Lay out crayon pieces on the letter to test your color pattern. Vertical placement with broken ends up gives the best texture and look.
- Glue crayons: Work in small sections — apply hot glue to the wood, then quickly press crayons in place. Cover the entire front surface.
- Fill gaps: Use smaller pieces or bits to fill spaces between crayons for a full, seamless look.
- Dry & finish: Let glue set completely. Optionally apply a light coat of clear sealant for extra durability and shine.
Creative Ways to Use Crayon Initials
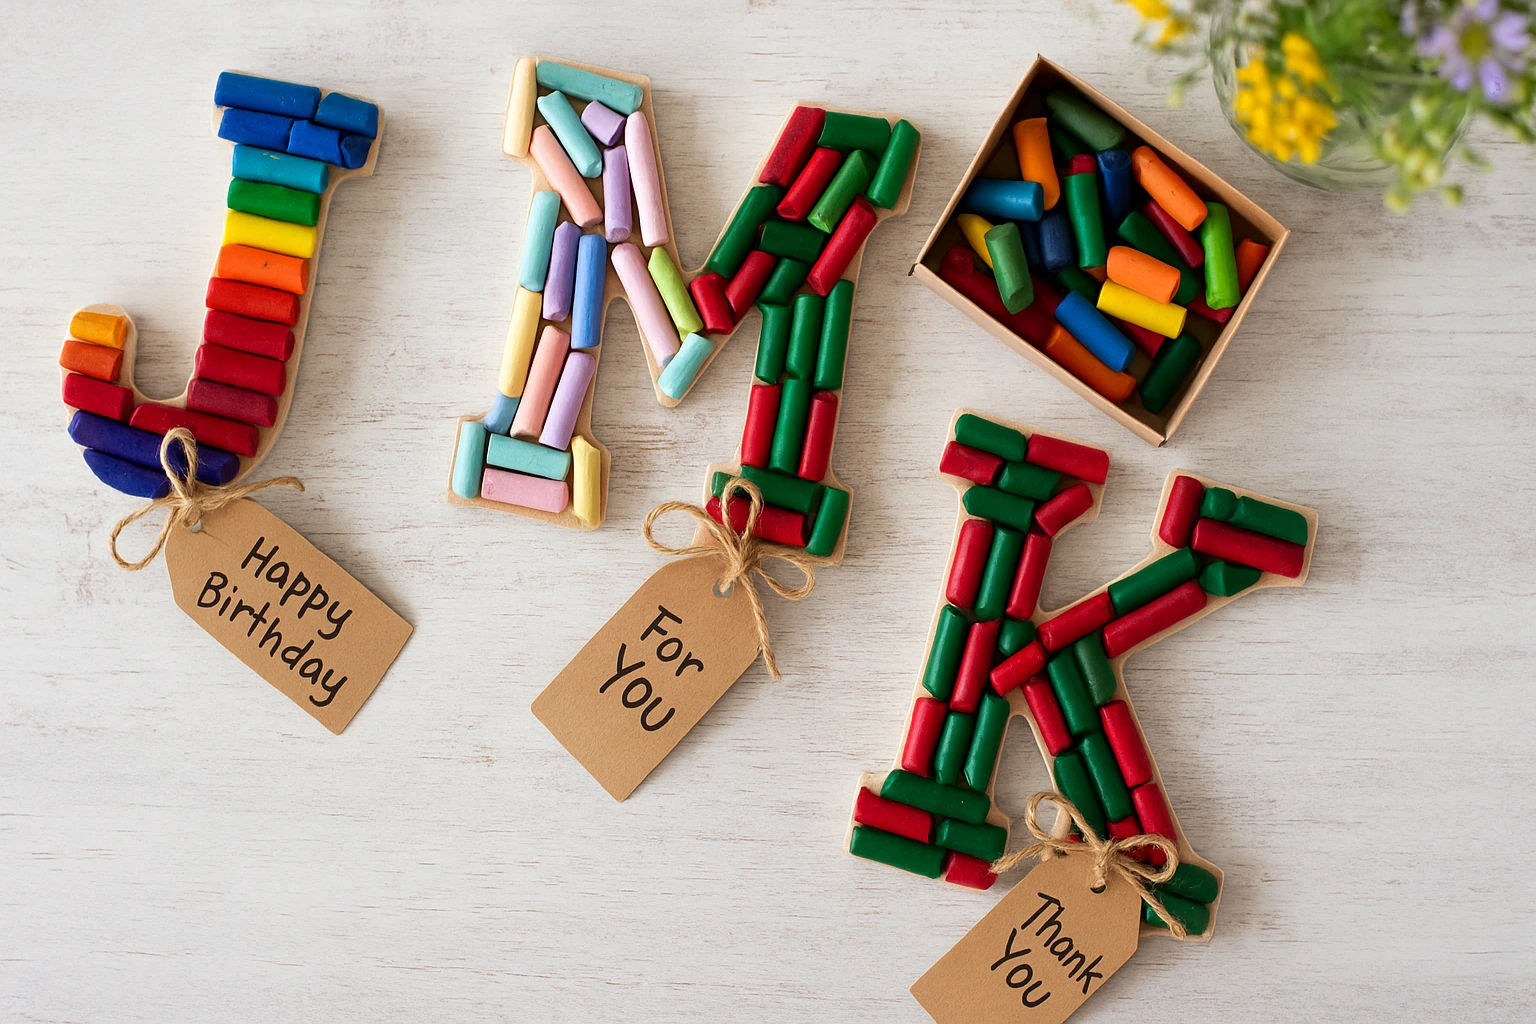
- Personalized name gifts for birthdays or baby showers
- Framed wall art for kids’ rooms or nurseries
- Small letters as party favors or gift toppers
- Holiday ornaments or teacher appreciation gifts
- Custom classroom or sports team decor
Variations to Try
- Rainbow or ombre color gradients
- Add glitter glue between pieces for sparkle
- Mount finished letter on reclaimed wood for rustic style
- Arrange crayons into shapes (hearts, flowers) instead of full coverage
- Mix in metallic or glow-in-the-dark crayons
Eco-Friendly & Sustainable Tips
- Collect broken crayons from schools, restaurants, or friends
- Use secondhand wooden letters or reclaimed wood
- Choose low-odor, non-toxic hot glue sticks and use only what you need (hot glue isn’t typically biodegradable).
- Display in thrift-store frames or with removable wall hooks
How to Host a Crayon Crafting Party
- Provide broken crayons, wooden letters, hot glue guns (adult use), and frames
- Set up stations for monograms, shapes, or mini versions
- Serve colorful, budget-friendly snacks
- Give fun awards like “Most Colorful” or “Best Upcycle”
Display Ideas
- Hang with removable command strips (renter-friendly)
- Frame in a shadow box for polished look
- Spell out a full name with multiple letters
- Display on shelf, desk, or nursery wall
- Add ribbon loop to hang on door or hook
Tips for Perfect Results
- Use same-brand crayons for uniform size and melt
- Create ombre by sorting light-to-dark shades
- Match colors to room theme, holiday, or team
- Paint letter sides/back first for clean edges
- Adult supervision required for hot glue with kids
- Seal with clear spray for longer-lasting color
Frequently Asked Questions
Yes — with adult help for hot glue and cutting crayons. Kids can sort colors, plan the design, and press pieces into place. It’s a fun, safe family upcycling project when supervised.
Broken crayons come from home, schools, or donations. Wooden letters and frames are at dollar stores, craft shops, or thrift stores. Silicon molds (for alternative crayon shapes) are inexpensive online.
Yes! Repurposing broken crayons prevents landfill waste. Pair with recycled frames or sustainable wood for an even greener project — perfect creative upcycling.
This upcycled craft guide transforms broken crayons into beautiful, long-lasting personalized decor and gifts. Ideal for sustainable crafting, budget projects, and creative recycling with kids.