
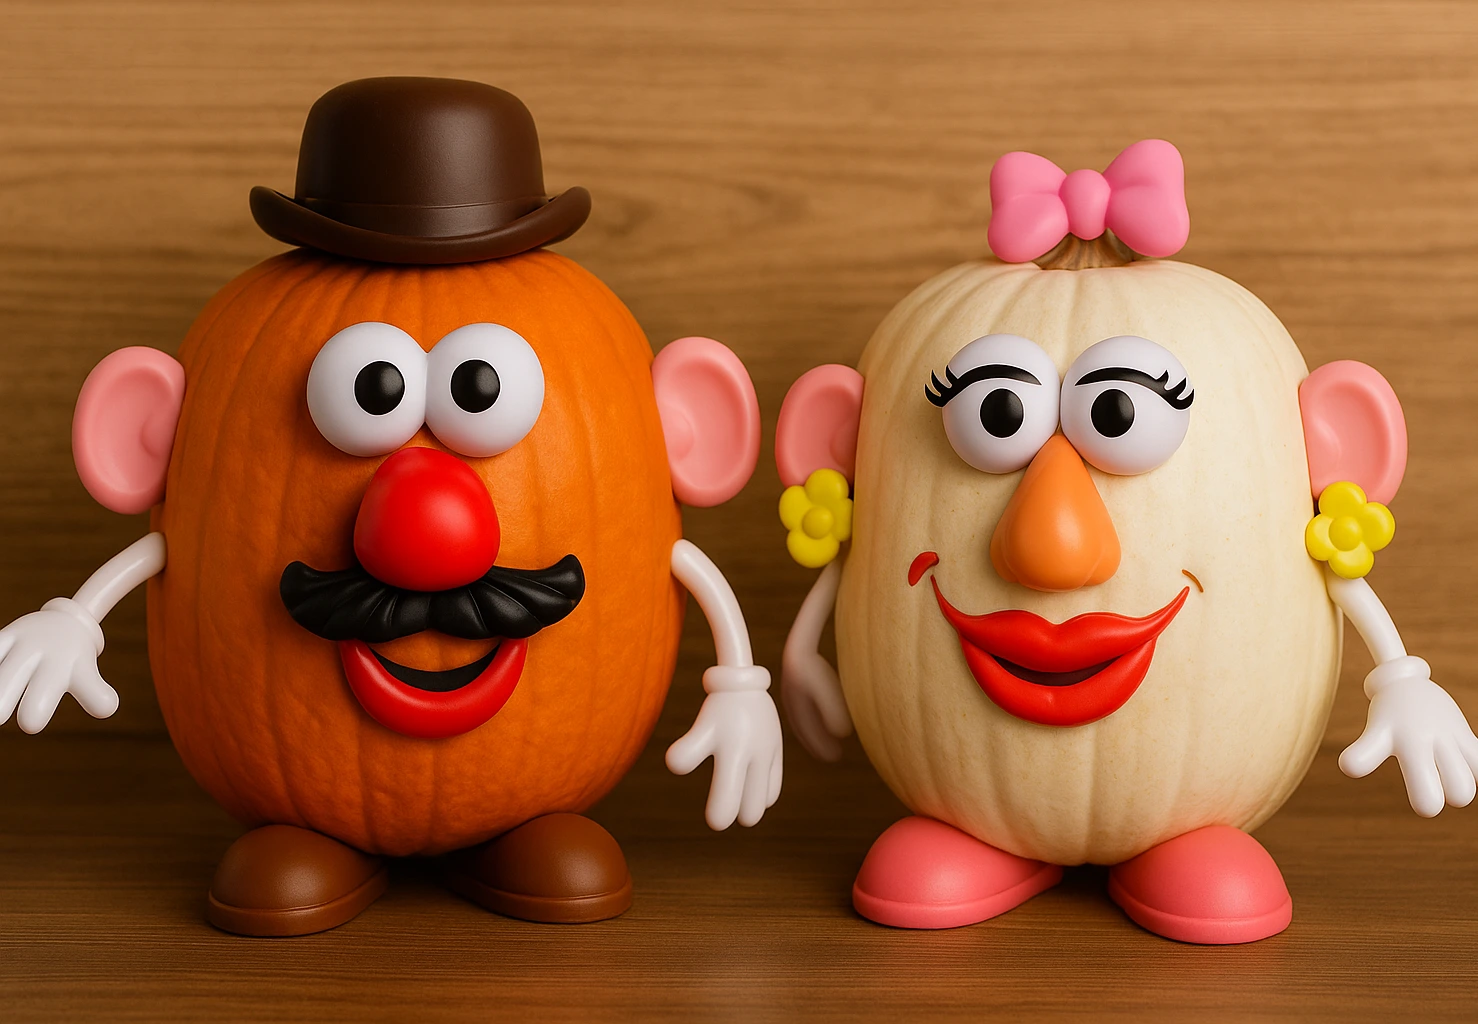
A carved pumpkin commits you to one expression. A Potato Head pumpkin can look surprised at breakfast and grumpy by dinner—then become a completely different character the next day.
The method is simple: arrange reusable toy pieces before making any holes, then have an adult create only the starter holes the pegs need. Start smaller than the peg and widen only as needed. The steps below cover setup, fitting problems, display, and cleanup without promising that every toy piece or pumpkin will behave the same way.
Table of Contents
- Choose the Pumpkin and Pieces
- Make the Potato Head Pumpkin
- Fix Loose or Tight Pieces
- Character Ideas
- Set Up a Pumpkin Station
- Care and Cleanup
- Frequently Asked Questions
Choose the Pumpkin and Pieces
Start with one firm pumpkin that sits flat without rocking. A relatively smooth side gives the face more room, but it does not have to be flawless. Skip pumpkins with soft spots, cracks, leaking areas, or a damaged stem.
Next, inspect the toy pieces. Peg sizes and shapes vary by set, so choose a few eyes, noses, mouths, ears, and hats before touching the pumpkin. Keep electronic pieces and anything that cannot be cleaned away from the project.
What you need
- One firm pumpkin with a stable base
- Potato Head face and accessory pieces
- A washable marker or small pieces of painter’s tape for placement marks
- A folded towel or nonslip mat to steady the pumpkin
- An adult-controlled pointed tool or drill with an appropriately small bit
Hold the pieces against the pumpkin first and build the whole face without making holes. Leave space around the stem, blemishes, and any area where the skin already looks thin or damaged.
How to Make a Potato Head Pumpkin
- Clean and dry the surface. Wipe away dirt with a damp cloth, then let the pumpkin dry. A wet surface is harder to mark and hold securely.
- Arrange the face. Dry-fit the pieces and mark the center of each peg location with a tiny washable dot or painter’s tape.
- Stabilize the pumpkin. Set it on a folded towel or nonslip mat. A child should not hold the pumpkin while an adult makes a hole.
- Create one starter hole. The adult should begin with a hole slightly smaller than the peg, keeping the tool pointed away from hands and the body.
- Test the first piece. Press with steady, gentle pressure. If the peg will not enter, remove it and widen the hole a little rather than forcing or hammering it.
- Repeat one piece at a time. Recheck the spacing as the face develops; the real pieces may sit differently from the dry layout.
- Do a final stability check. Confirm that the pumpkin sits flat and every piece stays in place when the pumpkin is left alone.
Fix Loose or Tight Pieces
The goal is a snug fit, not a perfect-looking hole. Stop and adjust as soon as the pumpkin skin begins to split.
- The peg will not enter: Remove it and let the adult widen the starter hole in a small increment. Do not hammer the toy piece.
- The piece spins or leans: The hole may be too large or the pumpkin may curve sharply there. Move the piece to a nearby fresh spot or try a piece with a wider peg.
- The skin starts cracking: Stop using that hole. Shift the feature away from the crack instead of forcing it wider.
- The pumpkin rocks: Move it to a flatter display surface or choose a more stable pumpkin. Do not cut the base flat.
- Pieces keep falling outdoors: Wind, handling, and temperature changes can loosen them. Use an indoor display or a more sheltered location.
Change the Character, Not the Pumpkin
The useful part of this craft is that the expression can change. Begin with the pieces already in the toy box before buying themed accessories.
- Paired display: use two pumpkins and divide the pieces into two complementary characters
- Surprised: wide eyes, open mouth, and raised ears
- Grumpy: angled eyes, mustache, and a low hat
- Fancy: glasses, bright lips, and a dress-up hat
- Pirate: eye patch, one earring, and a bandana placed around the pumpkin
- Mixed-up face: intentionally swap the expected positions and let children explain the character
Avoid attaching loose decorations near a flame or heat source. This pumpkin is not hollowed for a candle; treat it as a daytime or room-light display.
Set Up a Potato Head Pumpkin Station
For a group activity, separate designing from tool use. Children can choose pieces and arrange faces while one adult manages a single tool station. Make one hole at a time instead of pre-drilling a grid that may not match the final designs.
For children who are too young for small toy parts, use oversized paper features and painter’s tape instead. It changes the method, but keeps the face-building idea without the same peg and choking-hazard concerns.
Care, Display, and Cleanup
Keep the finished pumpkin in a cool, dry place away from heaters, direct sun, and standing moisture. There is no reliable fixed lifespan: the pumpkin’s starting condition, punctures, temperature, and handling all matter.
Check it daily. Remove it from the display if it develops mold, leaking liquid, a strong odor, or soft collapsing areas. Take out every toy piece before discarding or composting the pumpkin, and clean the pieces according to the toy manufacturer’s instructions before returning them to storage.
If this becomes one part of a low-cost family Halloween, the broader frugal entertainment guide can help you choose more activities around the time, energy, and budget you actually have.