
Colorful flower pots can refresh a porch, windowsill, or garden corner without turning into an expensive makeover. The key is to decide how the pot will be used before choosing paint: a planter filled directly with soil faces different moisture than a decorative cachepot that simply holds another container.
Table of Contents
- Choose the right pot and plan
- Materials
- How to paint terracotta pots
- Easy design ideas
- Outdoor use and care
- Troubleshooting
- Frequently asked questions
Choose the Right Pot and Plan
Start with a sound pot whose drainage hole is open. A small surface chip can become part of the design, but a crack that runs through the wall may spread when the pot is filled, moved, or exposed to freezing weather. If you are repainting an older pot, remove loose soil, mineral crust, and flaking finish before you begin.
| How you will use it | What matters most | Practical approach |
|---|---|---|
| Direct planter | Drainage and recurring moisture | Keep the drainage hole clear, paint the exterior, and choose products labeled for the surface and conditions. |
| Decorative cachepot | Removing trapped water | Place a nursery pot inside and empty collected water instead of letting the inner pot sit in it. |
| Indoor display | Protecting furniture and floors | Use a saucer or waterproof insert and lift the pot before wiping underneath it. |
You do not need a white base coat for every design. White can brighten pale colors, while terracotta left visible can become a warm part of the pattern. A primer or base coat should be chosen because the paint system calls for it, not because every pot requires the same recipe.
Materials
- A clean terracotta pot with an open drainage hole
- Paint labeled as compatible with masonry, terracotta, or the intended surface
- Primer and clear finish only if recommended for your chosen paint system
- Brushes or foam applicators suited to the design
- Low-tack painter’s tape, pencil, stencil, or dotting tool as needed
- Mild soap, water, and a non-abrasive brush for cleaning
- Drop cloth and any ventilation or protective equipment required by the product label
Buying one or two coordinated colors is usually enough. Use leftover compatible paint when its label fits the job, but do not mix unrelated coatings simply to use them up. Different products may have incompatible cure times or finishes.
How to Paint Terracotta Pots
- Clean the pot. Brush away loose dirt, wash as needed, and let the terracotta dry completely. Painting over dust or retained moisture can weaken adhesion.
- Plan the unpainted areas. Keep the drainage opening unobstructed. Decide whether the rim, base, or a band of terracotta will remain visible.
- Test the system. Try the primer or paint on a small, inconspicuous area. Follow the manufacturer’s directions for surface preparation, recoating, ventilation, and temperature.
- Apply thin, controlled coats. Thick paint tends to pool around the rim and texture. Let each coat dry for the time stated on the label before adding another.
- Add the design. Apply tape only after the underlying coat is ready for it. Remove tape according to the paint directions; waiting too long can pull up an edge.
- Finish only if appropriate. A clear coat is not automatically necessary. If you use one, confirm that it is compatible with the paint and suitable for the pot’s location.
- Allow a full cure. “Dry to the touch” is not always the same as ready for handling, planting, water, or outdoor exposure. Use the longest relevant cure time on the labels.
Three Easy Flower Pot Painting Ideas
1. Solid color with a terracotta band
Leave the rim or lower third unpainted and cover the rest with one color. This is the easiest design to repeat across pots of different sizes, and small brush variations are less noticeable than they would be in a detailed pattern.
2. Taped geometric blocks
Use a few broad shapes rather than many narrow stripes. Press tape firmly along the design edge without stretching it, apply paint away from the edge, and remove the tape as directed for the product. A small artist’s brush can correct minor bleed after the main coat has dried.
3. Dots or simple botanical marks
Make dots with a round applicator or add short leaf shapes with one small brush. Practice on scrap cardboard first so you can settle on spacing and paint load. Repeating one mark creates a finished pattern faster than drawing a different picture on every side.
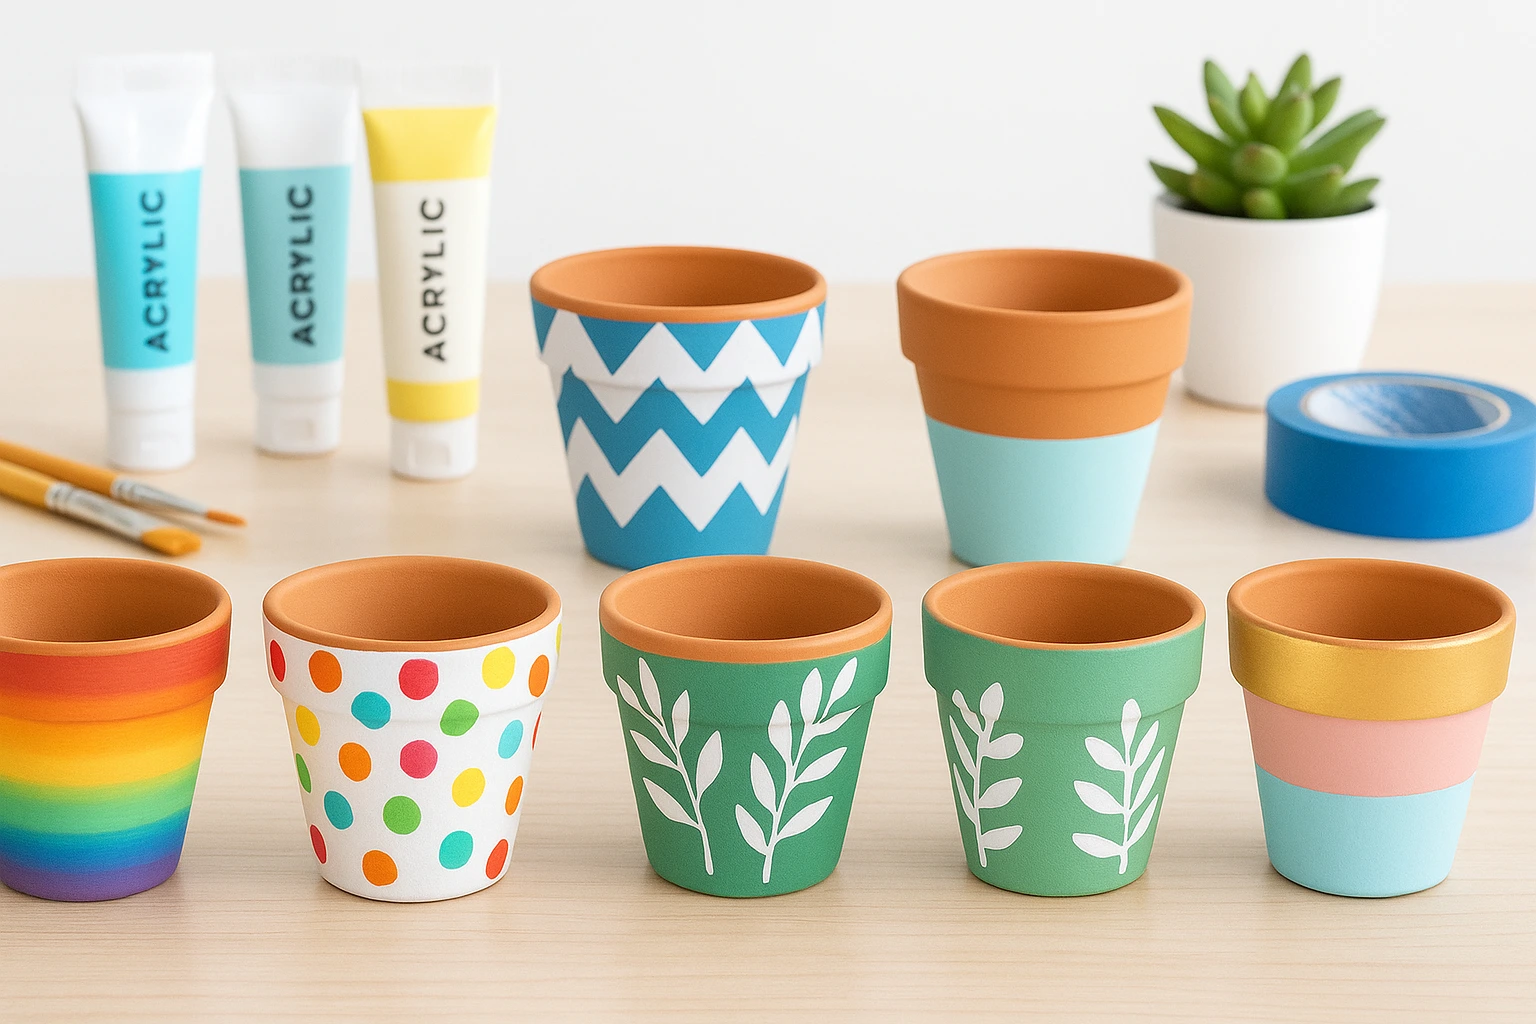
For a coordinated group, repeat one color across all the pots and vary the secondary color or pattern. That gives the collection a connection without requiring every pot to match exactly. Pair the finished containers with plants based on the plants’ light, space, and watering needs—not only on which flower color looks best with the paint.
Outdoor Use and Care
Place the pot where the plant can thrive, then accept that the finish may age differently depending on sun, rain, watering, and climate. Do not move a filled pot by its rim. Lift from the base, and avoid leaving the drainage hole pressed flat against a surface where water cannot escape.
- Wipe splashes gently instead of scrubbing the finish.
- Check that water still drains after repotting or moving the container.
- Follow local cold-weather practice for terracotta; absorbed water and freezing conditions can contribute to cracking.
- Touch up or refinish when the coating actually needs it rather than sealing on an automatic yearly schedule.
- Follow the label when using spray products or finishes; an adult should handle products that require ventilation, respiratory protection, or other precautions.
If this pot is one part of a larger outdoor refresh, choose function before decoration. These easy DIY backyard projects can help you plan one manageable improvement instead of buying several disconnected pieces.
Troubleshooting Painted Terracotta Pots
| Problem | Likely cause | What to try next |
|---|---|---|
| Paint peels or rubs away | Dust, moisture, incompatible layers, or insufficient cure | Stop adding coats, remove loose finish, let the pot dry, and restart with a compatible system. |
| Color looks patchy | Absorbent surface or uneven paint load | Let the coat dry as directed, then add another thin coat if the product allows it. |
| Paint bleeds under tape | Loose edge or too much paint near the line | Use less paint, work away from the edge, and correct small leaks with a detail brush. |
| Tape lifts the base color | Base layer was not ready or tape was too aggressive | Allow more cure time and test lower-tack tape before continuing. |
| Clear finish turns cloudy | Moisture, heavy application, or product incompatibility | Pause and consult the label before recoating; more finish can make the cloudiness worse. |
Frequently Asked Questions
Choose a product whose label lists terracotta, masonry, or a comparable porous surface and matches the intended indoor or outdoor use. Brand formulations differ, so the label is more reliable than a universal coat count.
Not always. It depends on the paint system, intended use, and desired finish. If you add a clear coat, verify compatibility and follow its preparation, application, and cure instructions.
For a pot that will hold soil directly, focus on the exterior and leave the drainage hole open unless the complete coating system specifically directs otherwise. A removable nursery pot inside a decorative cachepot is the simpler option when you want to keep soil and frequent watering away from the painted container.
Children can help with simple marks when an adult selects age-appropriate materials and supervises the activity. Adults should handle aerosol products, sealers, and any step whose label requires special ventilation or protective equipment.
Wait until every layer has completed the manufacturer’s stated cure time for handling and moisture exposure. A finish can feel dry before it is fully cured.